How to Generate AI Images for Blog Posts (Step-by-Step)
If you want blog images that look professional, match your brand, and publish faster than your competitors, learning how to generate AI images for blog posts is a high-leverage skill. With the right prompt structure and a simple workflow, you can produce hero headers, step-by-step illustrations, product mock-ups, and social visuals in minutes—without relying on overused stock photos.
Why AI images are worth using in blog posts
Images do more than “make a post look nice”. They improve comprehension, increase time on page, support your SEO (when properly optimised), and give readers visual anchors that help them remember your key points. AI image generation adds an extra advantage: you can create visuals tailored to a specific article, keyword, audience, and brand style—on demand.
For small teams and startups, this is especially useful because you can keep content quality high without hiring design help for every post. With Gen AI Last, you can generate images alongside your written content using our AI content tools, so your workflow stays in one place.
What types of AI images work best for blog posts
Before you write prompts, decide what role the image needs to play. The best-performing blog imagery is intentional.
- Hero/header image: sets the tone and topic instantly (often 16:9).
- Section dividers: consistent style visuals that break up long text.
- How-to illustrations: diagrams, “before/after”, process visuals.
- Concept visuals: abstract or metaphorical images that explain a complex idea.
- Product or UI mock-ups: ideal for SaaS, apps, and tutorials (avoid copying real brands).
- Social share images: alternate crops (1:1, 4:5, 9:16) derived from the hero image.
A practical rule: one strong hero image plus 2–5 supportive images is enough for most 1,500–2,000 word posts. Prioritise clarity over decoration.
Step-by-step: how to generate AI images for blog posts
Use this repeatable workflow to get consistent, publish-ready images. The steps below apply whether you’re creating lifestyle photography-style visuals, minimal illustrations, or 3D renders.
1) Define the image job (and where it will appear)
Start with placement and purpose. This prevents you generating a pretty image that doesn’t fit your page layout.
- Hero image: usually 16:9 (e.g., 1600×900 or 1920×1080).
- In-content image: often 4:3 or 1:1 depending on your theme.
- Pinterest/short-form promos: 2:3 or 9:16.
Write one sentence describing the job: “This is a 16:9 hero image for a blog post about generating AI images for blog posts, showing a content creator producing visuals on a laptop.” This becomes your prompt foundation.
2) Choose a consistent visual style (your “blog look”)
Consistency builds brand recognition. Decide on one of these style directions and stick to it across posts:
- Photorealistic: best for “real-world” credibility (tools, desks, studios, products).
- Minimal vector/flat illustration: best for clean, modern SaaS blogs.
- 3D renders: strong for tech or conceptual topics.
- Editorial/film still: good for storytelling and premium feel.
If you’re unsure, start photorealistic, neutral palette, soft natural light. It tends to work across industries.
3) Use a prompt formula that reliably produces usable results
Most weak AI blog images come from vague prompts (“make an image about AI”). Use a structured prompt instead.
Reliable prompt formula: Subject + setting + key objects + composition + lighting + style + camera details + restrictions.
- Subject: who/what is the focus?
- Setting: home office, studio, coffee shop, co-working space.
- Key objects: laptop, prompt box, image thumbnails, camera, notebook, colour swatches.
- Composition: “wide 16:9 header, negative space on the left” (useful for titles).
- Lighting: soft daylight, cool blue tech, golden hour, neon accents.
- Style/camera: photorealistic, shallow depth of field, 35mm lens.
- Restrictions: no text, no logos, no watermarks, no brand names.
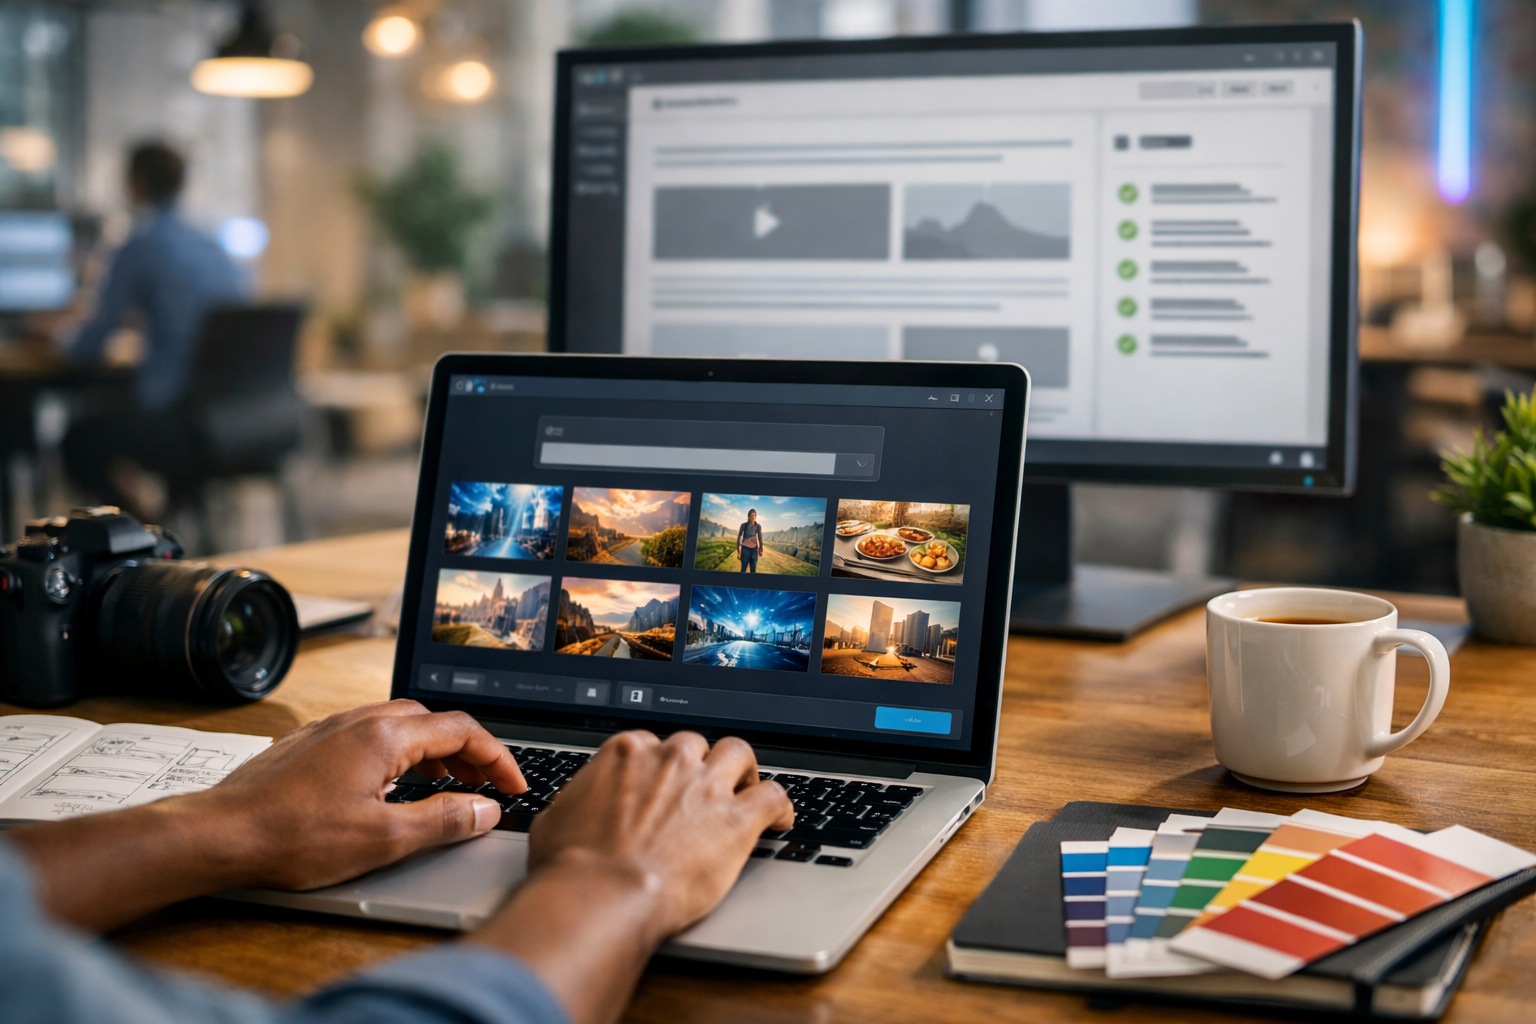
Example prompt (hero image): “Photorealistic 16:9 wide hero image of a content writer generating AI images for a blog post at a modern desk, laptop showing an AI image generator with multiple thumbnail variations (no readable text), notebook with wireframes, colour palette cards, coffee mug, soft natural light, shallow depth of field, clean modern aesthetic, space on the right for headline, no logos, no watermarks.”
4) Generate 4–8 variations, then iterate deliberately
Treat generation like photography: you take options, then adjust one variable at a time. After your first batch, pick the closest image and refine with targeted edits:
- Too busy? Remove objects and request “minimal desk, fewer items”.
- Wrong mood? Change lighting: “cool blue tech vibes” or “warm golden hour”.
- Needs space for text overlay? Ask for “clear negative space on the left”.
- Faces look odd? Specify “hands only” or “back-facing subject”.
In Gen AI Last you can generate images quickly alongside your draft, which makes iteration easier because you’re refining visuals while the article structure is fresh. If you’re building a consistent content pipeline, view pricing from $10/month to keep unlimited-style experimentation affordable for a small team.
5) Create a set: hero + 2–5 supporting images
Instead of generating random images, design a set that matches your headings. For this topic, a simple set might be:
- Hero: creator generating AI blog imagery on a laptop.
- Prompt formula graphic: minimalist illustration of prompt building blocks.
- Workflow visual: “generate → select → resize → compress → upload”.
- Brand consistency: side-by-side variations showing consistent palette and style.
This approach makes your post feel cohesive and “designed”, even if you’re a one-person marketing team.
Prompt templates you can copy for blog images
Use these as starting points. Swap the bracketed parts to match your niche and article angle.
Template 1: Photorealistic hero image (safe and versatile)
“Photorealistic 16:9 wide hero image of [your audience persona] working on [topic], [setting], [key objects], clean modern composition with negative space for headline, [lighting style], shallow depth of field, high detail, natural colours, no text, no logos, no watermark.”
Template 2: Minimal illustration for a how-to section
“Minimal flat vector illustration, 16:9, showing [process] using simple shapes and icons, limited colour palette [palette], clean background, modern SaaS style, crisp edges, no text, no logos.”
Template 3: Concept metaphor image (for thought leadership posts)
“Cinematic photorealistic scene, 16:9, depicting a metaphor for [concept], [subject] in [setting], dramatic [lighting], high contrast, subtle depth of field, editorial photography style, no text, no logos.”
Template 4: Product mock-up without copying real brands
“Photorealistic 16:9 mock-up of a generic web app dashboard on a laptop screen (abstract UI shapes, no readable text), [setting], professional lighting, clean desk styling, no brand names, no logos, no watermark.”
Common problems (and fixes) when generating AI images for blog posts
Problem: The image looks “AI-ish” or uncanny
Fix: Use simpler compositions, fewer objects, and realistic lighting. Avoid close-up faces for headers unless you can generate consistently high-quality portraits. Try “hands only”, “back-facing subject”, or “over-the-shoulder view”.
Problem: The image doesn’t match the article topic closely enough
Fix: Add concrete topic cues: “blog editor with image placeholders”, “SEO checklist icons”, “thumbnail grid of blog header images”. Specificity beats adjectives.
Problem: The image includes unwanted text or gibberish
Fix: Explicitly add “no text, no readable text, no typography, no letters”. Also choose scenes where text would naturally be minimal (e.g., blurred UI, icons only).
Problem: Cropping breaks the composition on mobile
Fix: Keep the subject centred, reserve generous margins, and avoid tiny details. Generate a secondary version designed for square/portrait crops for social distribution.
SEO and performance: optimise AI images so they actually help rankings
Generating an image is only half the job. Optimisation affects speed (Core Web Vitals), accessibility, and discoverability.
Use descriptive file names
Rename files before uploading. Example: how-to-generate-ai-images-for-blog-posts-hero.webp rather than image123.png.
Write helpful alt text (not keyword stuffing)
Alt text should describe what’s in the image for screen readers and when images fail to load. It can include your keyword naturally if it fits.
- Good: “Laptop showing an AI image generator creating header images for a blog post.”
- Bad: “how to generate ai images for blog posts how to generate ai images…”
Compress and use modern formats
Aim for WebP (or AVIF if your stack supports it). Keep hero images often under ~200–300KB where possible without obvious artefacts. Large uncompressed PNGs can hurt load time and rankings.
Match dimensions to your theme
Upload appropriately sized images so the browser isn’t resizing huge files. Common hero sizes: 1600×900, 1920×1080. For in-content visuals, 1200px wide is typically enough.
Add captions when they add clarity
Captions are read more often than body text. Use them to reinforce the key takeaway of a visual (especially for processes and comparisons).
Brand consistency: how to make AI blog images look like a designed system
To avoid a “random image” look across your blog, standardise these elements:
- Palette: choose 3–5 brand colours and mention them in prompts (“muted blues and warm neutrals”).
- Lighting: pick one default (e.g., soft natural light) and one accent mood (e.g., cool tech).
- Composition: decide where negative space goes for titles (left or right).
- Props: repeat signature objects (notebook, desk plant, colour swatches, tablet).
- Style words: reuse a consistent phrase such as “clean modern editorial photography”.
If you also generate your article text and supporting social captions in the same session, you’ll keep your voice and visuals aligned. Gen AI Last makes this easier by combining text, image, audio, and video generation in one platform via our AI content tools.
Ethics, licensing, and practical safeguards
AI images are powerful, but you should use them responsibly—especially for commercial blogs.
- Avoid real brand assets: don’t ask for recognisable logos or trademarked characters.
- Avoid public figure likeness: don’t generate images intended to look like real people without permission.
- Be careful with “before/after” claims: if you depict results, ensure your post doesn’t imply misleading outcomes.
- Disclose when appropriate: some audiences appreciate a small note like “Images created with AI”.
If your blog includes sensitive topics (health, finance, legal), keep visuals factual and non-deceptive, and ensure they support—not replace—expert guidance.
Turn one blog post into a full media pack (images, video, audio)
Once you’ve generated the hero and supporting images, you can repurpose the same article into additional assets:
- Social graphics: square and portrait crops for LinkedIn, Instagram, and Pinterest.
- Short explainer video: convert headings into scenes and use your images as backdrops.
- Voice-over: turn the article summary into narration for the video or a mini-podcast.
Gen AI Last supports text, image, video, and audio generation from simple prompts, which means one idea can become a complete content bundle without jumping between tools. If you want to test the workflow, start creating for free and build a small template library of prompts for your next five posts.
Quick checklist: generate AI images for blog posts like a pro
- Decide image purpose and placement (hero, divider, how-to, concept).
- Choose a consistent style and lighting direction.
- Use a structured prompt (subject, setting, objects, composition, lighting, restrictions).
- Generate variations, refine one variable at a time.
- Create a cohesive set (hero + 2–5 supporting images).
- Optimise for SEO: filenames, alt text, compression, correct sizing.
- Repurpose into social assets, video, and audio for maximum reach.
Final thoughts
Knowing how to generate AI images for blog posts is less about “clever prompts” and more about having a dependable system: clear image roles, consistent style choices, and SEO-first optimisation. Once you’ve built a small prompt library, you can publish faster while keeping your visuals on-brand and genuinely helpful to readers.
If you want an all-in-one workflow—write the post, generate matching images, then produce a supporting video or voice-over—Gen AI Last keeps everything under one roof. You can view pricing from $10/month when you’re ready to scale beyond a one-off experiment.
Ready to Create with Generative AI?
Join thousands of creators using Gen AI Last to generate text, images, audio, and video — all from one platform. Start your 7-day free trial today.
Start Free — Try 7 DaysQuick Links
Create AI content from $10/month
View Plans